All,
It's 0730 on 9 August 1986, and Team Whiskey is again playing the role of fire brigade. Having moved to counter the northern pincer enveloping Frankfurt (and successfully turning back the Red horde in their sector), Team Whiskey was pulled back to see where the next blow would land. They didn't have to wait long.
Rhein-Main Airbase has been key to NATO evacuation of civilians in the region, serving as both a collection point and evacuation point. But evacuation operations concluded this morning with the Soviets once again striking the flightline, and with Soviet armored formations on the horizon, the decision was made that Rhein-Main had to abandoned. All day NATO troops have been packing up personnel and gear, and destroying what couldn't be taken. But these were lightly-armed rear echelon troops, and so with Soviet troops on the airfield's perimeter, Team Whiskey was flung into a hasty defense. But due to travel issues (military and civilian traffic blocking the way, dealing with Soviet interdiction airstrikes, and getting lost due to no time available for route reconnaissance), only Captain Bronshtein's Kilo Company makes it into position in time, where they link up with two teams from 10th Special Forces Group (10 SFG). And here comes the Soviet armor...

The opposing forces, with Soviets on the left and NATO on the right. If you're thinking there's quite a disparity between the two, you're correct ;)
The US force, commanded by Captain Bronshtein. He has his two infantry platoons (1st under Lt Candersen and 2nd under Sgt Bajers), four TOW teams attached from Weapons Company, two teams from 10 SFG, and an A-10 on-call (it will have four passes to make, two with Mavericks and two with its 30mm gun). The CO and both 10 SFG teams can call in arty, and the CO has several Stinger SAMs in his command track.
For activation cards, the US is such:
-CAS
-SOF
-1st Platoon
-2nd Platoon
-TOW1
-TOW2
Two quick admin notes:
1) India Company still has M2/3 Bradleys left, but Kilo's all got blown up a long time ago. They've been riding around in M-113s they 'borrowed' from various US and West German formations along the way. Seeing these as unsuitable for combat, they ride them to their destination then dismount to fight, having the tracks laager off-board.
2) Sgt Bajers is not the rank 'Sergeant,' i.e., an E5. I haven't really specified, but I figure he's probably a Sergeant First Class (E7) or Master Sergeant (E8). But I will simply refer to him in the reports at Sgt Bajers. Or, as the Army does, "Big Sarge." ;)
The Red horde, the stuff of your nightmares: ten T-72s (masquerading as T-64s, if that makes you feel better), 18 BMPs with rifle teams, four command vehicles and teams (one BTR-50 for their CO and three BMPs for company commanders), one ZSU-23/4 anti-aircraft vehicle, two 2S1 122mm self-propelled guns (they will be off table and fire one fire mission per turn, called/marked by any command stand; above you get a look at how most of my Cold War/Modern 6mm stuff is based, 'platoon bases' with three vehicles per stand), and an Mi24 Hind attack helicopter.
Soviet activation cards are:
-Attack Helo
-Off table arty
-Tanks
-Mech 1 BMPs
-Mech 1 Infantry
-Mech 2 BMPs
-Mech 2 Infantry
-Mech 3 BMPs
-Mech 3 Infantry
Overview of the map showing part of the Rein-Main flightline, north is down, east is left. The US force is emplaced in a line roughly running north/south (bottom to top) from the end of the road at the bottom up to the end of the taxi-way at top. The US does not have a lot to work with in terms of forces or terrain.
Overview of the US defenses, looking south to north. Lt Candersen's platoon is on the left (up where the road and the left taxiway go off table), Sgt Bajers' platoon is on the bottom table edge in the center (where that road goes off the table), TOW 1 is at center, TOW2 is at far right (orange building), and there's an SF team on the far left and far right.
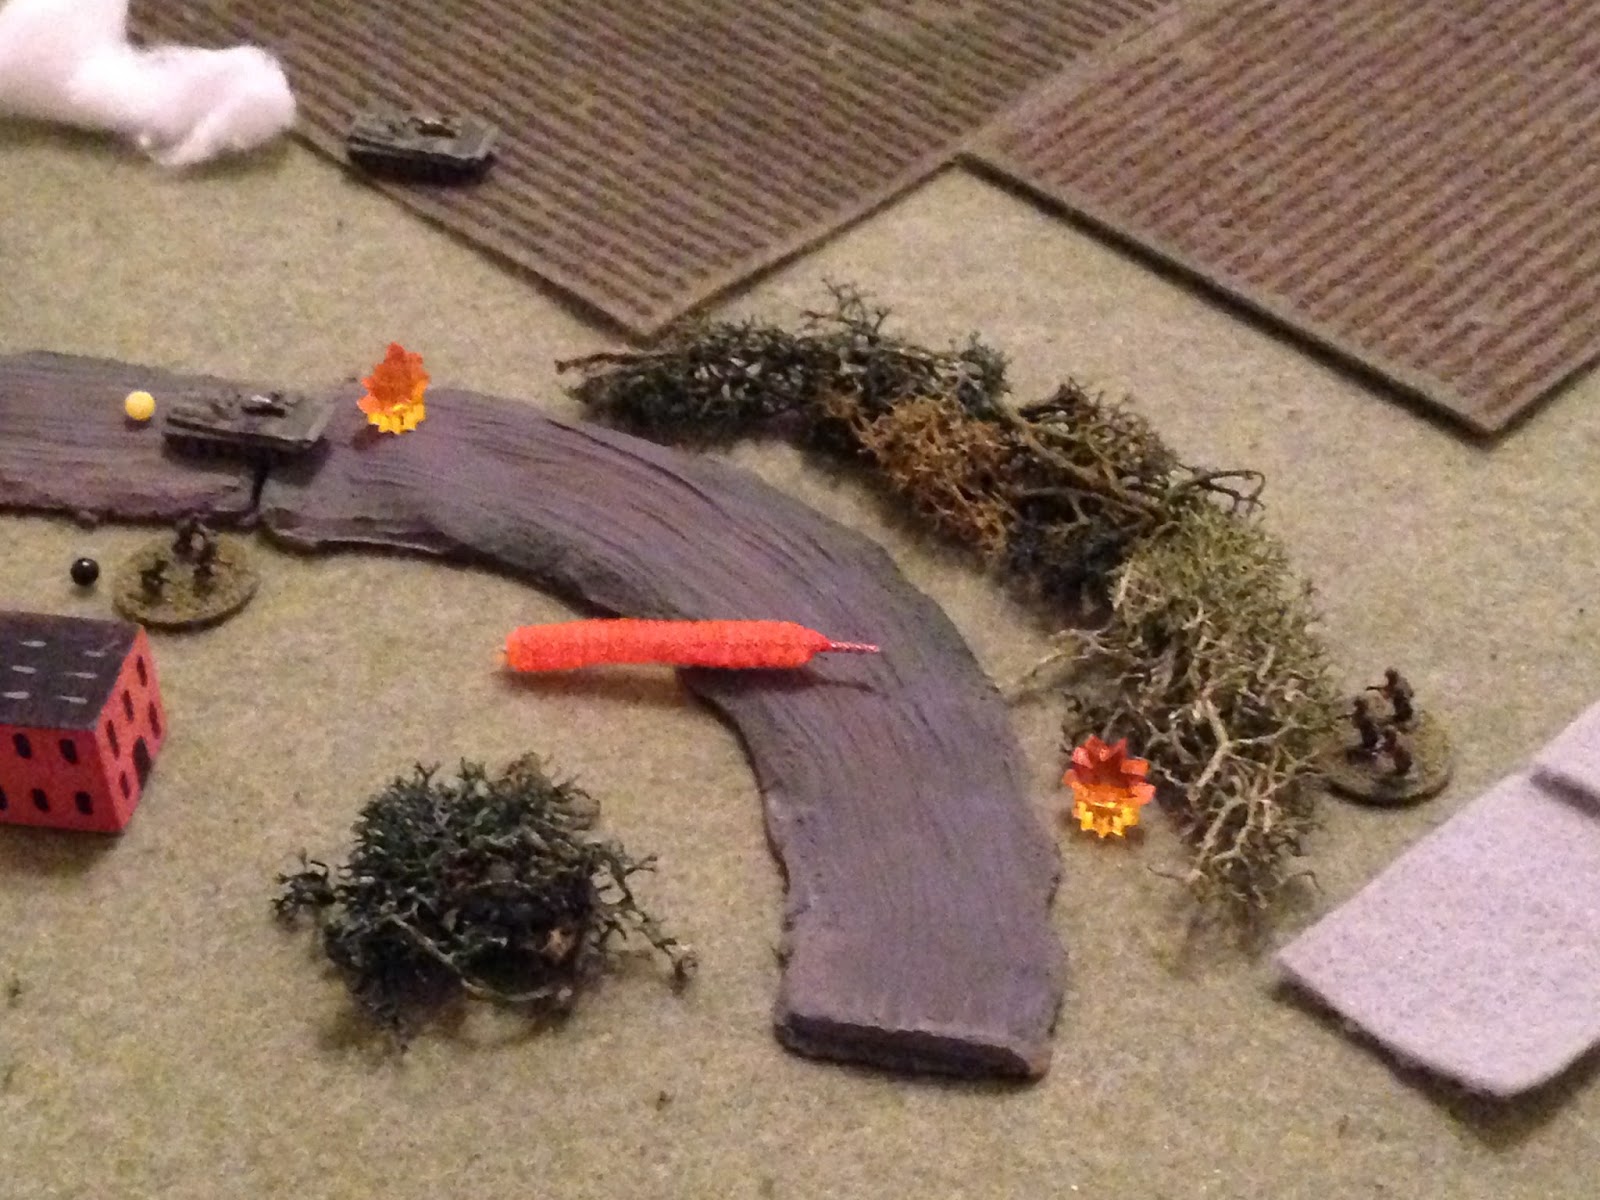
The far US right flank, with SF Tm2 at bottom right and TOW2 at far right (one in building, the other in a crater).
Looking south to north at the US center-rear: Sgt Bajers' 2nd Plt is spread across the bottom (with only one LAW per team they need to make it count, so while they are way in the rear, they have placed themselves astride the enemy's most likely route of march) and TOW1 at top center (again one in building and one in crater).
As always, the TOWs are very vulnerable to return fire, so they must displace immediately after firing. If they're still alive...
Looking south to north at the US far left, with SF Tm1 at left atop building, Capt Bronshtein at bottom center atop building, and Lt Candersen's platoon spread across the bush from center to top left.

Looking north to south from the Soviet baseline at their left side. Right now, only Soviet Mech 1 BMPs and infantry are on the table, everyone else is off table but will come on in Turn 1. The goal of the Soviets is real simple: get as many tanks and BMPs off the southern table edge as possible. So their plan is real simple: Mech 1 has dropped off its infantry as they are essentially sacrificial lambs. The seven BMPs of Mech 1 are simply going to move ahead at their greatest speed, laying smoke behind them to cover the advance of their comrades. The Soviet tanks and ZSU will follow directly in trace, while Mech 2 (with infantry mounted) charges up the road on the right and Mech (also with infantry mounted) will charge up the far left side. Mech 2 and 3 will advance to a point they believe their infantry can support the overall advance, then disgorge them. Following that the BMPs will then move to the center and follow the tanks and Mech 1 BMPs off table to the south. The Soviet CO plans on getting into a multi-story building at the northern board edge then getting busy identifying US dismounted anti-tank weapons (TOWs) and calling in the Hind and arty on them.
In other words, charge!!!
A look, from north to south, at the Soviet right. The road at right is the one Mech 2 will be charging down.
One last look at the table before all hell breaks loose, looking southwest to northeast, straight down the flightline, US in the foreground, Soviets at top.
Let's get it started, and even getting started is interesting. If a US card comes out first, a TOW section can launch and pop some BMPs of Mech 1 before they even start laying smoke, and if two US cards come out in a row, both TOW sections can pretty much wreck Mech 1 before they get anything done. Of course, a Soviet card means Mech 1 BMPs are off and running, laying smoke to cover their buddies, so the TOWs can pop the lead BMPs but are going to have a hard time identifying what's behind them (and that includes calling in the A-10.
And ain't that just my luck... A Soviet card sees the game open with the BMPs of Mech 1 charging ahead, splaying smoke everywhere to cover their comrades. I could have my four TOWs react fire, but they would fire at reduced effect and, in terms of the smoke, the damage is already done.
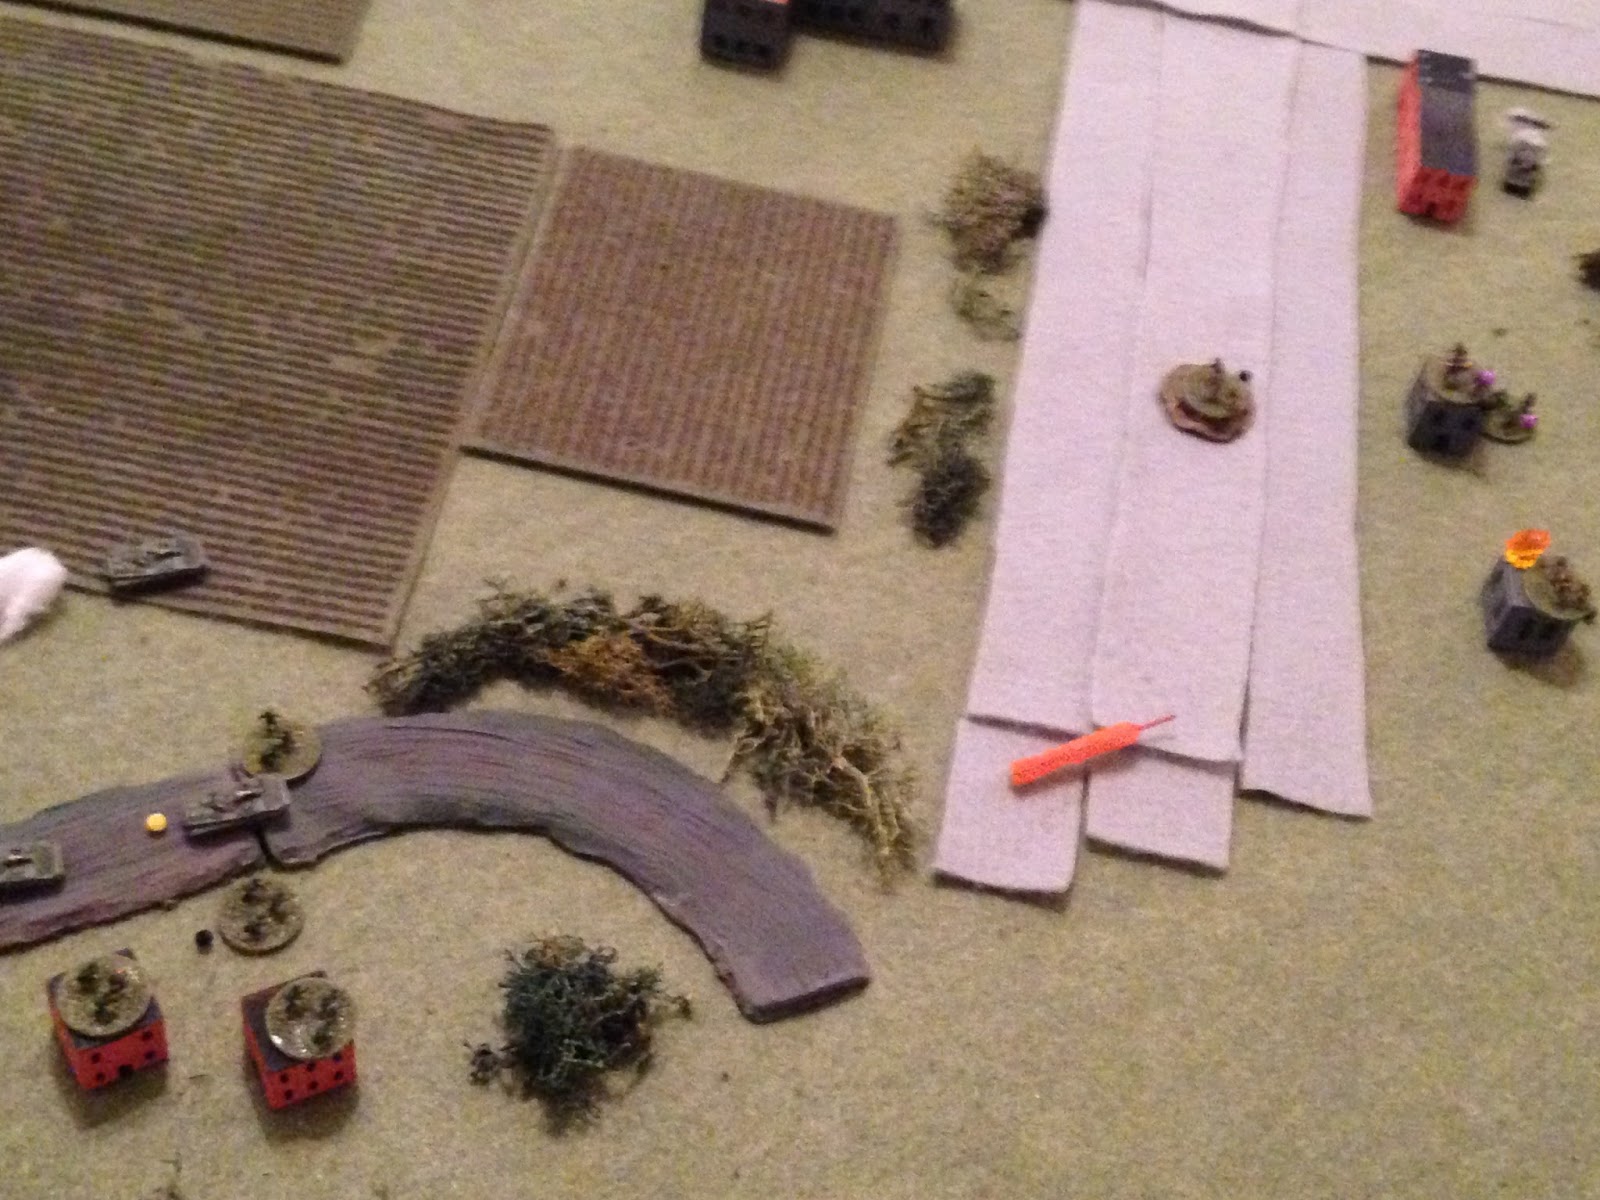
Looking north to south: but what really pisses me off is that somehow they manage to spot TOW2 on their far left (US far right), and two of them open fire with their 30mm guns. Off camera to bottom, the enemy CO hoists himself onto a rooftop and marks TOW2's position for arty (pink bead at top left).
Looking west to east again (you can see the enemy CO at far left, command stand atop a gray building with BTR-50 nearby): the Soviet arty is not ready yet, so they send the infantry of Mech 1 trudging along behind their BMPs, choking on the smoke...
And the Soviet infantry take some shots at TOW2 as well, while the ZSU moves up (bottom center, the only vehicle not trailing smoke).
The TOW team in the crater (left) is fine, but the team in the building is forced to fall back and hunker (red bead).
Looking west to east, Soviets on the left and US on the right: and then, somehow, the Mech 1 infantry spot Lt Candersen's 1st Platoon (three teams behind three bushes at far right). This is incredible! Mech 1's commander marks the position for helo attack.
And here comes Soviet arty on TOW2 (shaking the camera pretty well, apparently). One TOW team is knocked out; fortunately it was the team that was already hunkered, so at least the other team is still in shape to fight, but I just lost 25% of my organic, long-range AT capability, and their fickle enough with how long it takes to get them back into action after they fire.
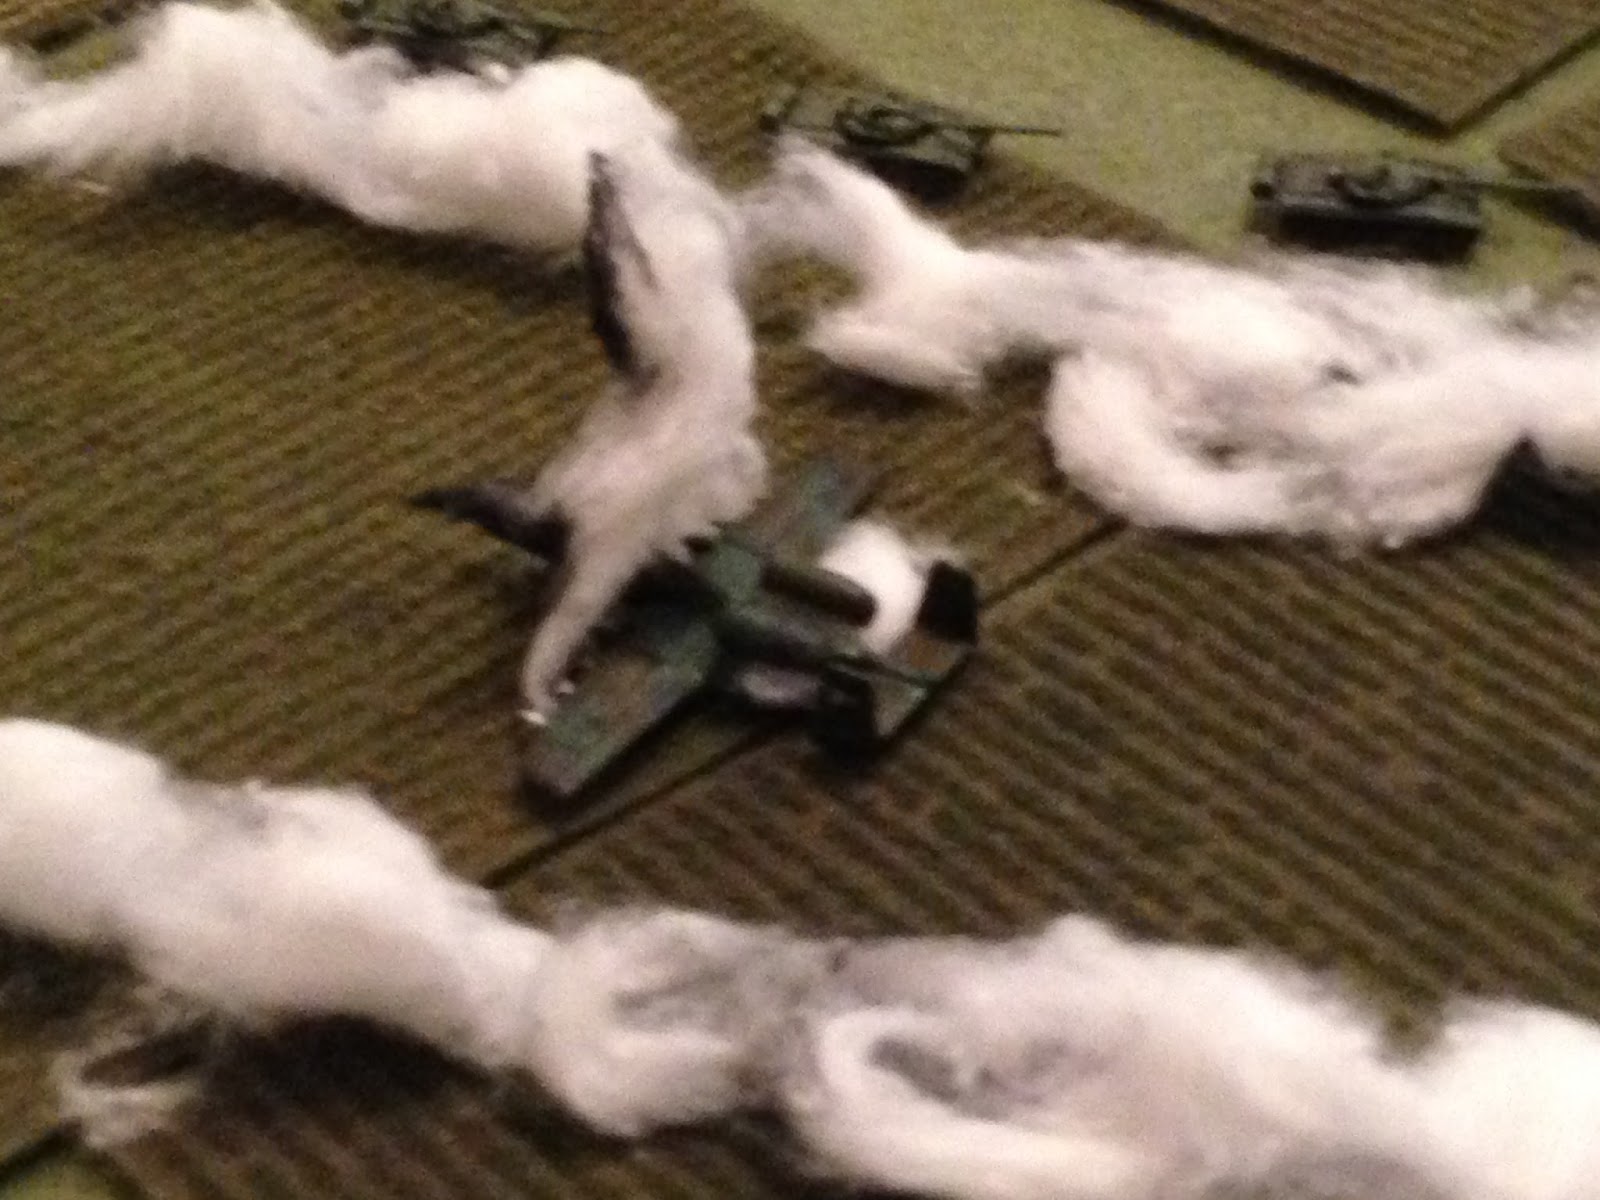
The fourth straight Soviet card (did I shuffle these things) and a great activation roll (for availability) see the Soviet Hind come on to pound Lt Candersen's platoon. Captain Bronshtein's team is the only one with SAMs, but they're in a building right now so unable to react fire.
Here comes a bunch of 57mm rockets...
That's a cool looking pic, if I do say so myself ;)
One rifle team is forced to fall back (center right, red bead, between SF1 at bottom center and the CO at top right), while Lt Candersen's team is pinned (yellow bad at top left). Could've been worse...
A fifth straight Soviet card sees Mech 3 come on the board in the east (on the Soviet left; this is looking west to east).
Still looking west to east, just a little further south (Mech 3 just came on the table off camera to top left): the one remaining team of TOW2 fires on a BMP of Mech 1 in the center of the battlefield.
The BMP is knocked out, and the ZSU is forced to fall back (bottom left, red bead).
Looking south to north, TOW2 is able to fall back unmolested (from crater at top right).
Looking south to north in the center, anther US card sees TOW1 launch its wire-guided missiles at BMPs of Mech 1 (the two vehicles just left of the BMP TOW2 just knocked out).
At center, the first TOW strikes home and knocks out a second BMP, also pinning the Mech 1 commander (yellow bead at left). But the BMPs and dismounted infantry are spraying fire everywhere, and so the second missile falls short, missing completely (!!??). The target returns fire, but he misses too.
Looking west to east, TOW1 falls back (Soviets are off camera to left) from the building and crater at bottom left.
Looking west to east at the Soviet right, Mech 2 comes on the table.
Followed by the Soviet tanks coming on in the center (three columns at left, two of three tanks and one of four tanks), following their smoke-laying little brothers. They also rally the ZSU (red bead at center left).
Looking south to north at US right, SF Tm2 (bottom right) marks Soviet Mech 3 for the A-10's first pass (top right). It really sucks that the Soviet tankers just rallied the ZSU...
Back on the US left, Capt Bronshtein and his team hop down out of the building at launch a Stinger at the Soviet helo, while SF Tm1 hops down from their building (gray at bottom right) and moves to the hunkering 1st Platoon team, where they rally them.
The Stinger misses, but is close enough to drive the Hind off for a bit (far left, from explosion at far right). Don't worry, he'll be back...
Looking south to north at the US left, the rifle team that just got rallied by SF Tm1 moves left and hides behind the building at bottom left, while Lt Candersen tries and fails to rally his boys. They stay pinned (yellow bead at top center)...
Death From Above arrives.
And pops some AGM-65s at the BMPs of Mech 3 (top right).
But he only manages to knock out one BMP, and, even then, their damn rifle team got out safely.
Things don't seem to be going my way. That's the end of Turn 1.
Looking west to east at the US center-rear, TOW1 manages to double time out of the field (blue beads) into cover near Sgt Bajers' platoon.
The Mech 1 BMPs push further ahead.
The Soviet CO marks the US CO's position for arty (pink bead at bottom left) while two BMPs of Mech 1 fire on the previously spotted Lt Candersen.
Forcing his command team to fall back (center right, red bead, right next to SF Tm1) from the explosions at far left.
Arty's not ready yet, so Mech 3 pushes forward on the Soviet left (looking west to east).
Still looking west to east (Mech 3 at top center): arty still not ready, so Mech 2 (bottom, on road) charges up the road, not spotting the last team from 1st Plt (bottom right).
But the Soviet Mech 2 commander recognizes this as a good ambush spot, so he dismounts the first half of his infantry to take a look (I'm a solo gamer, so I take a look at the situation, come up with some courses of action, lay odds on them, then roll dice to see what the bad guys decide to go. More lucky dice for the Soviets).
This forces me to act a bit prematurely: the unspotted 1st Plt team fires their LAW.
Which skips off the front glacis of the BMP, pinning it. Soviet infantry return fire.
The fire misses, and so I cheat a little bit and allow the rifle team to fall back (crater at center, from explosions at bottom left, with Mech 2 off camera to left). The US team shouldn't have been able to move since they were react firing... Meanwhile, SF Tm1 rallies Lt Candersen's team (center right) and they move into the building, as does Candersen's last team (bottom center, with Capt Bronshtein at top right).
Just in time for Soviet arty to fall.
The command track is knocked out (a very luck damage roll on my part to have the track knocked out rather than one of my command, rifle, or SF teams), and Capt Bronshtein's team is forced to fall back (bottom right, red bead, from top center).
Again, coulda been worse. Knock on wood, the past couple games has seen the Soviet arty not as devastating as it had been in previous games.
The Soviet tanks and ZSU move up in trace of Mech 1's BMPs, shrouded in smoke. They try to rally Mech 1's commander, but fail and he falls back (bottom left red bead, from yellow bead at center left). The Soviet CO (far left) then sends his BTR-50 to Mech 1's commander to rally him, scoop him up...
While his infantry still hoof it forward behind their BMPs.
I know it seems backwards to have the infantry following the BMPs, but bear with me. The infantry dismounted because I figure all the BMPs of Mech 1 are going to get smoked, so no use having them turn into caskets for the riflemen too. And keep in mind the Soviets have to keep moving; I probably haven't mentioned it, but there's a time limit for them to get their vehicles off the southern (right) table edge.
A rare photo looking east to west, or at least northeast to southwest, The one dismounted rifle team of Mech 3 (bottom center left), the one that escaped the destroyed BMP, moves up next to the tracks. The Hind tries to right itself, but fails and will not be available next turn either!
Back in the east with Mech 2, their PC hops into a building (bottom left), as does a rifle team, while the other two rifle teams move up and rally the pinned BMP. The rifle team in the building fires at one of Lt Candersen's squads.
And the doggies are forced to fall back and hunker...
While, looking south to north on the US right, SF Tm2 (bottom right, with the one team of TOW2 above them, blue bead), again marks Mech 3 (pink bead at top right) for the A-10.
Damn, a second east to west pic: it looks funny, but at bottom left is SF Tm2, and they are actually on top of a building. But the pic is here to show TOW2 (just right of SF Tm2) falling back to cover (from the blue bead at bottom right).
So, the TOW is in firing position, but I think you can see the problem: the BMPs of Mech 1 are strung from center to top left, laying smoke. They are all already past TOW2 (or will be by the time he reloads), and the smoke is obscuring the tanks following Mech 1.
Back on the US left, SF Tm1 rallies the hunkering 1st Plt rifle team (bottom left), while Capt Bronshtein rallies his command team.
The A-10 rolls in for its second pass, only to spot a stream of 23mm tracers rising at him...
But his evasive action causes the fire to miss, and he lays more Mavericks into the BMPs of Mech 3.
The guided missiles wreak havoc: two BMPs are knocked out, one is forced to fall back (far left, red bead), and one is pinned (center, yellow bead). The only downside was that one rifle team managed to squeak out of a destroyed BMP.
And Turn 2 is in the books.
Back on the US left, SF Tm1 (bottom right) marks Mech 2 (far left) for the A-10's next run.
While back on the right, SF Tm2 creeps forward, remaining hidden, looking to place themselves between TOW2 (blue bead) and any encroaching infantry from Mech 3 (top right).
Back on the left, the Soviet Mech 2 commander (bottom left) marks 1st Plt for arty (pink bead at far right), while his infantry move forward. Two US teams react fire, while one of the Soviet teams fires.
Amid the flurry of fire, which actually sees a second Soviet team open up, no on is seriously hurt. In fact, the only effects are that one Soviet rifle team is pinned (far left, yellow bead). Nice work guys...
Another Soviet card and a great roll means 122mm rounds being impacting on 1st Platoon.
But they manage to force one team to fall back and hunker (red bead at right, from top left), and pin another.
The BMPs of Mech 2 push forward, kicking out the rest of their infantry (bottom left) while the first two open up with their cannons.
SF Tm1 is unaffected (bottom right), but Lt Candersen's team is 'men down' (far right, white bead).
The Special Forces lads launch a LAW in return.
Another BMP down. It's a shame they already kicked their infantry out...
The US CO sprints up (bottom left) and rallies the pinned rifle team.
And they dash forward and launch a LAW of their own (pink bead at left is marking for the A-10).
They blow up their target BMP (center right), and force another to fall back and hunker (red bead at far left, next to orange house. Again, the pink bead on the road is marking targets for air).
With Mech 2 at bottom center and US 1st Plt at bottom right, Mech 1's BMPs again push ahead, still streaming smoke.
Two of them fire their guns at Lt Candersen's team, to no effect.
But somehow some a BMP in the center of Mech 1 spots the damn teams of TOW1 and opens fire. The 30mm rounds miss, but damn, how the hell did they get spotted already!? Not good...
Looking south to north, the two TOW teams fall back further into cover (blue beads behind the buildings at bottom center, from the explosion just above them. The BMP that spotted/shot at them is at top center). They still need to reload, and that foliage at the bottom of the photo is the US table edge. Nowhere left to fall back to...
The tanks and ZSU follow Mech 1's BMPs.
On the Soviet left, their dismounted rifles fall back to rally the BMPs scared off by the A-10's last run.
The BMP that was hunkering in the last photo is good, but the pinned BMP fails and falls back (far left, red bead, from the infantry team at top right).
And then the A-10 comes in on the US left. He's out of Mavericks and so he opens up with his 30mm Gatling gun.
One BMP is knocked out, and another has its gun damaged but the crew stays in the vehicle (red/white beads at center), and a rifle team is pinned.
As the A-10 pulls out of his gun run (bottom right), the ZSU opens fire with its quad-23mm guns (top left).
Say it ain't so... @#$%!!!!
Back on the Soviet left, the hunkering BMP (far left) self rallies while his buddies move up (top right).
The Soviet Hind has fixed itself and is available for fire support next turn.
Looking north to south, the Soviet riflemen of Mech 1 follow their BMPs, and not the tanks. At bottom left is the ZSU-23/4 vehicle that just shot down the A-10, which now rests at center right, just above two Soviet rifle teams.
Looking southeast to northwest at the US right, TOW2 reloads with SF Tm2 (bottom right) watching the BMPs of Mech 3 (top right) get closer. And no more A-10 to call...
The situation at the end of Turn 3, looking west to east. Things are not looking good for the home team: on the US right (top center right, where the road comes in), all that's there is one TOW team (that really can't see anything) and one SF team. In the US center, they are pushed all the way back to their table edge (far right), with Sgt Bajers platoon and two TOWs. Situated as they are, I have no doubt they'll soon be candidates for Soviet arty and helo attack. Hopefully I can get TOW1 reloaded and fired before they get waxed by Soviet supporting fires. On the US left (bottom center, right at the taxiway), the CO, one SF team, and Lt Candersen's platoon is in contact with Mech 2 and is being flanked by Mech 1 (center).
More to follow.
V/R,
Jack


No comments:
Post a Comment